

How To Get A Security Camera Inside The Unity
Camera component
Switch to Scripting
Cameras A component which creates an prototype of a item viewpoint in your scene. The output is either drawn to the screen or captured equally a texture. More info
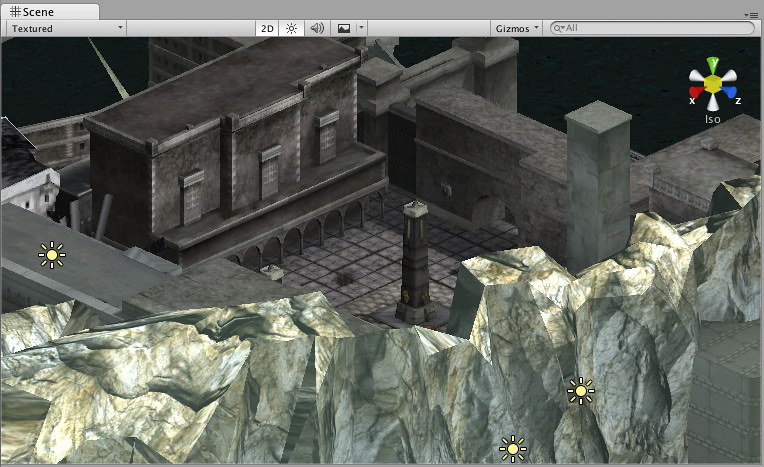
Come across in Glossary are the devices that capture and brandish the globe to the histrion. By customizing and manipulating cameras, you tin make the presentation of your game truly unique. You can have an unlimited number of cameras in a scene A Scene contains the environments and menus of your game. Think of each unique Scene file as a unique level. In each Scene, yous place your environments, obstacles, and decorations, essentially designing and edifice your game in pieces. More info
See in Glossary . They tin can be set to render in any order, at any identify on the screen, or only certain parts of the screen.
Camera Inspector reference
Unity displays dissimilar properties in the Camera Inspector A Unity window that displays data nigh the currently selected GameObject, asset or project settings, allowing yous to inspect and edit the values. More info
See in Glossary depending on the return pipelineA serial of operations that accept the contents of a Scene, and displays them on a screen. Unity lets you lot choose from pre-built render pipelines, or write your own. More info
See in Glossary that your Project uses.
- If your Project uses the Universal Render Pipeline (URP), see the URP package documentation microsite.
- If your Project uses the Loftier Definition Render Pipeline (HDRP), encounter the HDRP package documentation microsite.
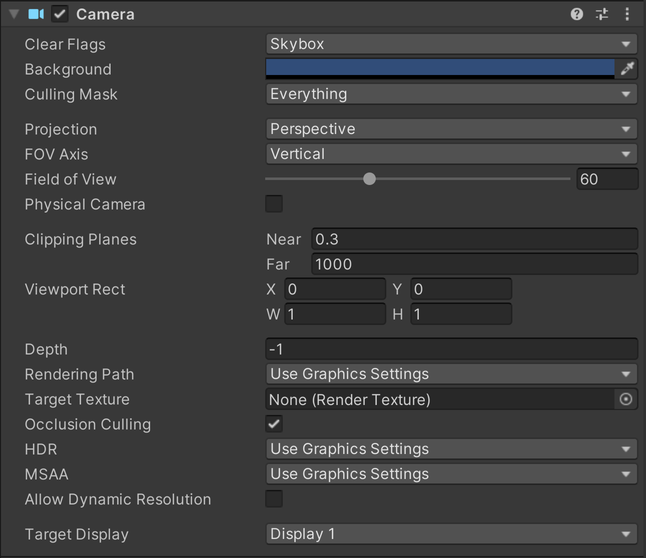
- If your Projection uses the Built-in Return Pipeline, Unity displays the following properties:
| Property: | Function: |
|---|---|
| Clear Flags | Determines which parts of the screen volition exist cleared. This is handy when using multiple Cameras to draw different game elements. |
| Background | The color applied to the remaining screen after all elements in view have been drawn and in that location is no skybox A special type of Material used to represent skies. Usually six-sided. More info Come across in Glossary . |
| Alternative Mask Allows you to include or omit objects to be rendered past a Camera, by Layer. See in Glossary | Includes or omits layers of objects to be rendered by the Camera. Assigns layers to your objects in the Inspector. |
| Projection | Toggles the camera'south capability to simulate perspective. |
| Perspective | Camera volition render objects with perspective intact. |
| Orthographic | Camera will render objects uniformly, with no sense of perspective. NOTE: Deferred rendering is not supported in Orthographic style. Frontwards rendering A rendering path that renders each object in ane or more than passes, depending on lights that touch on the object. Lights themselves are also treated differently by Forrard Rendering, depending on their settings and intensity. More than info Come across in Glossary is always used. |
| Size (when Orthographic is selected) | The viewport The user'due south visible area of an app on their screen. Run across in Glossary size of the Photographic camera when set to Orthographic. |
| FOV Axis (when Perspective is selected) | Field of view axis. |
| Horizontal | The Photographic camera uses a horizontal field of view axis. |
| Vertical | The Camera uses a vertical field of view axis. |
| Field of view (when Perspective is selected) | The Camera'southward view angle, measured in degrees forth the axis specified in the FOV Centrality driblet-downwardly. |
| Concrete Photographic camera | Tick this box to enable the Physical Camera properties for this camera. When the Concrete Camera properties are enabled, Unity calculates the Field of View using the backdrop that simulate existent-world photographic camera attributes: Focal Length, Sensor Size, and Lens Shift. Physical Camera properties are not visible in the Inspector until yous tick this box. |
| Focal Length | Gear up the distance, in millimeters, between the camera sensor and the camera lens. Lower values result in a wider Field of View, and vice versa. When you change this value, Unity automatically updates the Field of View property accordingly. |
| Sensor Type | Specify the existent-world camera format you lot want the camera to simulate. Choose the desired format from the list. When you cull a camera format, Unity sets the the Sensor Size > 10 and Y backdrop to the correct values automatically. If you modify the Sensor Size values manually, Unity automatically sets this belongings to Custom. |
| Sensor Size | Gear up the size, in millimeters, of the camera sensor. Unity sets the Ten and Y values automatically when you choose the Sensor Blazon. Y'all can enter custom values if needed. |
| 10 | The width of the sensor. |
| Y | The height of the sensor. |
| Lens Shift | Shift the lens horizontally or vertically from middle. Values are multiples of the sensor size; for example, a shift of 0.5 along the 10 axis offsets the sensor by half its horizontal size. You can apply lens shifts to right distortion that occurs when the camera is at an angle to the subject field (for example, converging parallel lines). Shift the lens along either axis to make the camera frustum oblique. |
| X | The horizontal sensor offset. |
| Y | The vertical sensor kickoff. |
| Gate Fit | Options for irresolute the size of the resolution gate (size/aspect ratio of the game view) relative to the film gate (size/attribute ratio of the Physical Camera sensor). For further information near resolution gate and film gate, see documentation on Concrete Cameras. |
| Vertical | Fits the resolution gate to the height of the picture gate. If the sensor aspect ratio is larger than the game view aspect ratio, Unity crops the rendered image at the sides. If the sensor aspect ratio is smaller than the game view aspect ratio, Unity overscans the rendered epitome at the sides. When you choose this setting, irresolute the sensor width (Sensor Size > X property) has no result on the rendered prototype. |
| Horizontal | Fits the resolution gate to the width of the film gate. If the sensor aspect ratio is larger than the game view aspect ratio, Unity overscans the rendered image on the pinnacle and bottom. If the sensor aspect ratio is smaller than the game view aspect ratio, Unity crops the rendered image on the top and bottom. When you lot choose this setting, irresolute the sensor height (Sensor Size > Y property) has no outcome on the rendered paradigm. |
| Fill up | Fits the resolution gate to either the width or meridian of the picture gate, whichever is smaller. This crops the rendered image. |
| Overscan | Fits the resolution gate to either the width or elevation of the flick gate, whichever is larger. This overscans the rendered image. |
| None | Ignores the resolution gate and uses the picture show gate simply. This stretches the rendered paradigm to fit the game view aspect ratio The relationship of an image's proportional dimensions, such every bit its width and height. See in Glossary . |
| Clipping Planes | Distances from the photographic camera to outset and terminate rendering. |
| Near | The closest point relative to the camera that drawing will occur. |
| Far | The furthest point relative to the camera that drawing will occur. |
| Viewport Rect | Iv values that signal where on the screen this camera view will exist fatigued. Measured in Viewport Coordinates (values 0–ane). |
| X | The beginning horizontal position that the camera view will exist fatigued. |
| Y | The beginning vertical position that the photographic camera view will be drawn. |
| W (Width) | Width of the photographic camera output on the screen. |
| H (Meridian) | Height of the camera output on the screen. |
| Depth | The camera's position in the draw order. Cameras with a larger value will be drawn on top of cameras with a smaller value. |
| Rendering Path The technique that a return pipeline uses to render graphics. Choosing a different rendering path affects how lighting and shading are calculated. Some rendering paths are more suited to different platforms and hardware than others. More info Encounter in Glossary | Options for defining what rendering methods will be used by the camera. |
| Use Player Settings | This camera will apply whichever Rendering Path is ready in the Player Settings Settings that let you ready various player-specific options for the last game built by Unity. More info Come across in Glossary . |
| Vertex Lit | All objects rendered by this camera will exist rendered as Vertex-Lit objects. |
| Forwards | All objects will be rendered with i pass per material. |
| Deferred Lighting | All objects will exist drawn once without lighting, then lighting of all objects will be rendered together at the finish of the render queue. Note: If the camera's projection mode is set to Orthographic, this value is overridden, and the camera will e'er employ Forward rendering. |
| Target Texture | Reference to a Render TextureA special type of Texture that is created and updated at runtime. To use them, commencement create a new Render Texture and designate one of your Cameras to render into information technology. Then you lot can use the Return Texture in a Textile just like a regular Texture. More info See in Glossary that will incorporate the output of the Camera view. Setting this reference volition disable this Camera'due south capability to render to the screen. |
| Occlusion Alternative A that disables rendering of objects when they are non currently seen past the camera because they are obscured (occluded) by other objects. More info See in Glossary | Enables Occlusion Culling for this camera. Apoplexy Culling ways that objects that are hidden backside other objects are not rendered, for example if they are behind walls. See Occlusion Culling for details. |
| Allow HDR | Enables High Dynamic Range rendering for this photographic camera. See Loftier Dynamic Range Rendering for details. |
| Allow MSAA | Enables multi sample antialiasing A technique for decreasing artifacts, like jagged lines (jaggies), in images to make them appear smoother. More than info See in Glossary for this photographic camera. |
| Allow Dynamic Resolution | Enables Dynamic Resolution rendering for this photographic camera. See Dynamic ResolutionA Camera setting that allows you to dynamically scale individual render targets, to reduce workload on the GPU. More info Run across in Glossary for details. |
| Target Display | Defines which external device to render to. Between 1 and viii. |
Details
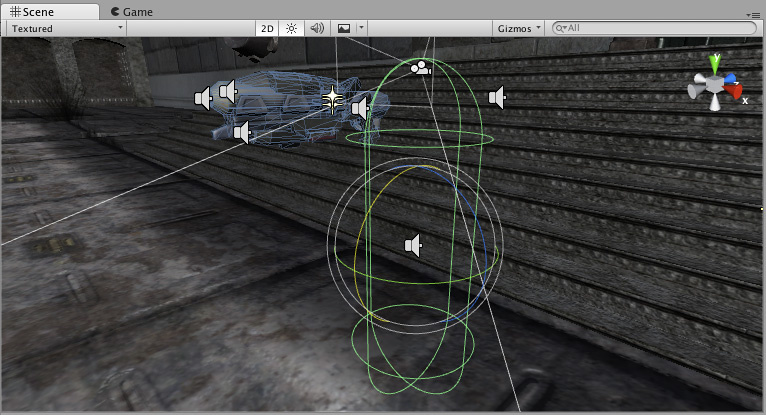
Cameras are essential for displaying your game to the actor. They can be customized, scripted, or parented to achieve just about whatsoever kind of effect imaginable. For a puzzle game, you might keep the Photographic camera static for a full view of the puzzle. For a first-person shooter, you would parent the Camera to the thespian character, and place it at the character'south heart level. For a racing game, you'd probably have the Photographic camera follow your role player's vehicle.
You tin can create multiple Cameras and assign each one to a different Depth. Cameras are drawn from low Depth to high Depth. In other words, a Camera with a Depth of 2 volition be drawn on pinnacle of a Camera with a depth of 1. Yous tin adjust the values of the Normalized View Port Rectangle property to resize and position the Camera's view onscreen. This can create multiple mini-views like missile cams, map views, rear-view mirrors, etc.
Render path
Unity supports dissimilar rendering paths. You should cull which one you utilize depending on your game content and target platform / hardware. Different rendering paths have dissimilar features and performance characteristics that mostly affect lights and shadows. The rendering path used by your Projection is chosen in the Player settings. Additionally, you can override it for each Camera.
For more than information on rendering paths, check the rendering paths page.
Articulate Flags
Each Camera stores colour and depth information when it renders its view. The portions of the screen that are non drawn in are empty, and volition display the skybox by default. When you are using multiple Cameras, each 1 stores its own colour and depth information in buffers, accumulating more data as each Camera renders. Every bit whatever particular Camera in your scene renders its view, you can prepare the Clear Flags to clear different collections of the buffer data. To practise this, cull one of the following iv options:
Skybox
This is the default setting. Any empty portions of the screen will display the electric current Photographic camera's skybox. If the current Camera has no skybox gear up, information technology will default to the skybox chosen in the Lighting Window (menu: Window > Rendering > Lighting). It will so fall back to the Background Color. Alternatively a Skybox component can be added to the camera. If you want to create a new Skybox, you can use this guide.
Solid color
Whatever empty portions of the screen will brandish the current Camera's Background Color.
Depth only
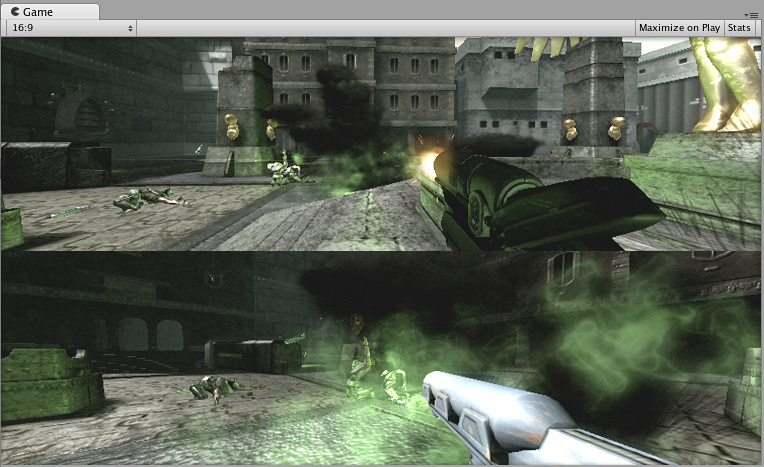
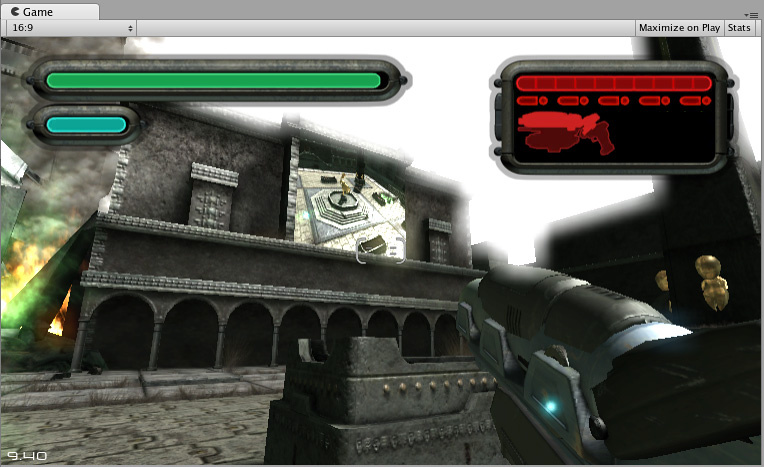
If you desire to draw a player'due south gun without letting it get clipped inside the environment, set 1 Camera at Depth 0 to draw the surroundings, and another Photographic camera at Depth 1 to draw the weapon solitary. Set up the weapon Camera'south Clear Flags to depth only. This will proceed the graphical display of the environs on the screen, merely discard all data about where each object exists in 3-D space. When the gun is drawn, the opaque parts will completely embrace annihilation drawn, regardless of how close the gun is to the wall.
Don't clear
This way does not articulate either the color or the depth buffer A memory store that holds the z-value depth of each pixel in an image, where the z-value is the depth for each rendered pixel from the projection plane. More than info
Run across in Glossary . The event is that each frame is drawn over the adjacent, resulting in a smear-looking effect. This isn't typically used in games, and would more likely be used with a custom shader A program that runs on the GPU. More info
See in Glossary .
Note that on some GPUs (mostly mobile GPUs), not clearing the screen might result in the contents of it being undefined in the next frame. On some systems, the screen may incorporate the previous frame epitome, a solid black screen, or random colored pixels The smallest unit in a calculator paradigm. Pixel size depends on your screen resolution. Pixel lighting is calculated at every screen pixel. More than info
See in Glossary .
Clip Planes
The Near and Far Prune Plane properties make up one's mind where the Camera'south view begins and ends. The planes are laid out perpendicular to the Camera'southward direction and are measured from its position. The Almost plane is the closest location that will be rendered, and the Far aeroplane is the furthest.
The clipping planes also determine how depth buffer precision is distributed over the scene. In full general, to get better precision you should move the Near plane as far equally possible.
Note that the near and far clip planes together with the planes defined by the field of view of the photographic camera describe what is popularly known equally the photographic camera frustum. Unity ensures that when rendering your objects those which are completely outside of this frustum are non displayed. This is called Frustum Culling. Frustum Alternative happens irrespective of whether you lot use Occlusion Culling in your game.
For performance reasons, you might want to choose small objects before. For example, small-scale rocks and debris could exist fabricated invisible at much smaller altitude than large buildings. To do that, put minor objects into a carve up layer and ready per-layer cull distances using Camera.layerCullDistances script function.
Alternative Mask
The Alternative Mask is used for selectively rendering groups of objects using Layers. More information on using layers can be establish hither.
Normalized Viewport Rectangles
Normalized Viewport Rectangle is specifically for defining a certain portion of the screen that the current camera view volition be drawn upon. You tin put a map view in the lower-right manus corner of the screen, or a missile-tip view in the upper-left corner. With a scrap of design piece of work, you can use Viewport Rectangle to create some unique behaviors.
It'due south easy to create a two-player split up screen effect using Normalized Viewport Rectangle. After you have created your two cameras, change both photographic camera's H values to be 0.5 and then set histrion one's Y value to 0.5, and histrion two's Y value to 0. This volition make player one's camera display from halfway upwards the screen to the top, and histrion two'southward photographic camera offset at the bottom and stop halfway up the screen.
Orthographic
Marking a Photographic camera every bit Orthographic removes all perspective from the Photographic camera'south view. This is mostly useful for making isometric or second games.
Note that fog is rendered uniformly in orthographic camera mode and may therefore not appear equally expected. This is because the Z coordinate of the post-perspective space is used for the fog "depth". This is not strictly accurate for an orthographic camera but information technology is used for its performance benefits during rendering.
Return Texture
This will place the photographic camera's view onto a TextureAn image used when rendering a GameObject, Sprite, or UI element. Textures are often applied to the surface of a mesh to give it visual detail. More than info
See in Glossary that can then be applied to another object. This makes it easy to create sports arena video monitors, surveillance cameras, reflections etc.
Target brandish
A camera has up to viii target display settings. The camera can be controlled to render to ane of up to eight monitors. This is supported only on PC, Mac and Linux. In Game View the chosen display in the Camera Inspector will exist shown.
- 2018–10–05 Folio amended
- Physical Camera options added in Unity 2018.2
- Gate Fit options added in Unity 2018.three
Source: https://docs.unity3d.com/Manual/class-Camera.html
Posted by: morrislikendooked1945.blogspot.com
0 Response to "How To Get A Security Camera Inside The Unity"
Post a Comment